Tag Archives: recipes

Humble Hummus– The All-Natural Way

Standard

Ah, simple, docile, gentle hummus.

Even in all its modesty there is a reason why this Middle Eastern mix of mashed chickpeas is so famous worldwide. See, this extremely easy and dirt cheap dip is crammed protein, dietary fiber, iron and Vitamin C.

Hummus is very versatile and can be used in a number of ways: as an appetizer, a dip for veggies and flat bread, a spread on sandwiches and wraps, and on top of salads.

I’m a huge supporter of hummus being used as a staple in kids’ diets as well… it is so much better than any ranch dip they could smother their baby carrots in, my god.

This is the most basic, easy, no-nonsense all natural hummus recipe you could hope for. Of course you could use canned chickpeas, and darling, if that helps you  actually make hummus and eat it instead of a package of Oreos, then go for it! I chose to showcase here how I make it myself while cooking my own chickpeas to clear up any confusion people may have about that process. Hint: It’s actually super easy ;) Besides, like any Certified Mexican™ can tell you, there is no comparing the flavor of canned beans to that of a delicious pot of freshly cooked ones. Dreamy.

Ideally you will begin the process the night before by leaving the chickpeas to soak, though I sometimes skip this step if I happen to forget.

Also, be warned I like to cook chickpeas in big batches because once cooked they freeze beautifully and can be used in the future for new hummus batches, or soups and stews, side dishes, on salads, etc. WIN.

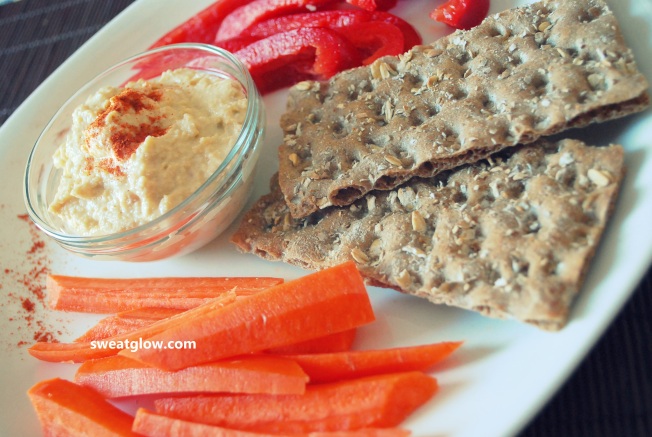
DSC_0783

All-Natural Hummus

-3 C dry chickpeas

-1 Tbs. Tahini (sesame seed butter, available in most supermarkets or health food stores)

-1 Tbs. extra virgin olive oil

-1/2 lime

-1 garlic clove

-sea salt, to taste

Chickpea cooking instructions:

Place the 3 C uncooked chickpeas in a large bowl and add water making sure the water covers them over by one inch, and leave soaking overnight. The following day drain the soaking water and rinse the chickpeas. Pass them to a saucepan and cover in water. Bring water to a boil.

Once it begins boiling, cover the saucepan and bring the heat down to low. Leave them cooking for about 20 minutes, always making sure the water doesn’t completely evaporate (add more if needed). Chickpeas will be cooked when they’re tender but firm, with no indications of tough or gritty centers.

There! Now you have fresh chickpeas, free of preservatives or chemicals. Yeah! Freeze the leftovers in 1 cup batches and they will be ready for next time.

To make the hummus:

Place 1 C of cooked chickpeas in the blender. Add 1 Tbs of Tahini, the juice of 1/2 lime, 1 Tbs of olive oil, 1 small garlic clove, and sea salt to taste. Blend it all into the desired consistency (add more olive oil or water from where you cooked the chickpeas if you need to make it less dense) and that. is. all.  See? Blend. Wham. You’re done.

Take a bow, baby. You did it.
BEHOLD. The Super Soup.

Standard

Has it really been since December that I last wrote here? All you need to know is I’m full of ideas and projects, which can only be a good thing for you, my dear reader. Alrighty then, on to business. Of the munchy kind.

“I’m too busy to eat right.”

“Hey, I’m lucky I even get to sit down and eat.”

“I just grab whatever because I’m always on a rush.”

And so on. I’ve heard it all, and dude, I’ve said it all. And you know what I say now? Bull to the shit.

Making healthier food choices can be easy– if you make it easy on yourself.

Listen, I’m no different than you and if I’m rushing to get things done and the baby has decided that she will shrill-scream to the top of her lungs lest she’s held with both arms and bounced like a human trampoline, but I’m starving and on one side there’s a salad to be chopped, assembled and dressed, and on the other side there’s a bunch of ready to eat Oreos, then fuck it and damn straight I’m stuffing those Oreos in my mouth– except I’m kissing them first for being the lifesavers they are.

Been there. Done that. Learned from it. 

It doesn’t mean I’m failing as a human being for not being able to do it all at once. It doesn’t mean my baby is a demanding tyrant who won’t let me eat. It just means I have to make things easier on myself.

What this means to me is that on the weekends, when hubs’ work load may be lighter and older sisi Anna is around to help hold the baby I go on a two hour cooking and prepping rampage. If you give it even a little bit of thought you will find a pocket of time here or there where your life situation will allow for you to do the same. And there’s no shame in asking for help. Think about it: if eating is something you have to do every single day, isn’t it worth your while to give yourself the best chance of success by using a bit of time to set up a few healthy meals? I sure think so.

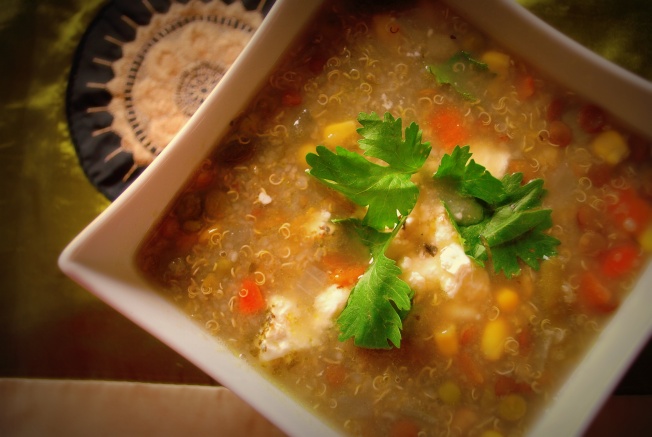
And here is a recipe ideal for this purpose: a truly super soup. Full of protein and nutrition, this is a meal you won’t regret. I made a HUGE batch of it, and am I ever thankful because it has made for a healthy lunch the last three days as I’ve been squeezed for time to cook. Store it, freeze it, keep it handy. Make it easier on yourself. 

quinoa vegetable soup

The Super Soup

4 C vegetable broth

1 C uncooked quinoa

1/4 C dry lentils

1/4 C dry split peas

1/4 C cooked chickpeas (you can used canned, but what I do is I cook dry chickpeas and freeze them in batches for cases like this)

1 onion, diced

1/3 C mixed veggies (I used frozen: green beans, corn, peas and carrot mix)

salt & pepper to taste

mustard powder

dry parsley

bay leaves

cilantro for garnish

goat cheese for garnish (optional)

Bring your veggie stock to a boil and add the quinoa, lentils, split peas, and bay leaves. After 15 minutes, add the onion, chickpeas and frozen veggies. Let it all simmer together at low heat for about 10 minutes more, add salt and pepper to taste, a bit of mustard powder, and sprinkle with dry parsley. Donezo. Seriously, that’s it peeps. Just remember to remove the bay leaves when serving.

To serve you can add goat, feta or panela cheese, or skip those to keep things vegan. Do not, however, skip out on the fresh cilantro. It makes things sooooooo good.

I love this kind of soup because it’s so easily transformed into something different. Add or remove any ingredients you want. Is it too bland? Add paprika. In the mood for zing? Ginger powder! Feeling daring? Chipotle powder (or adobo, omg yum). See? Now I’m hungry all over again just thinking of the possibilities. ENJOY.

Suck It Up, Buttercup

Standard

I hate winter. Then I love it. Which means I didn’t really hate it to begin with, it just annoys the crap out of me. The idea of six months of cold, darkness and –gasp– absolutely NO cute shoes is enough to have me in fetal position in a corner, holding myself and rocking.

But then there’s fireplaces, Christmas, playing in the snow, hot drinks, and creamy soups, and things don’t seem all that bad after all.

Creamy soups. Today’s order of the day.

Although this soup requires minimal ingredients, it is the kind of food that gives you warm, fuzzy feelings inside; it makes your innards giggle with childish joy and next thing you know you’re polar bear hugging the shit out of the mailman and the bank teller. Consider yourself warned.

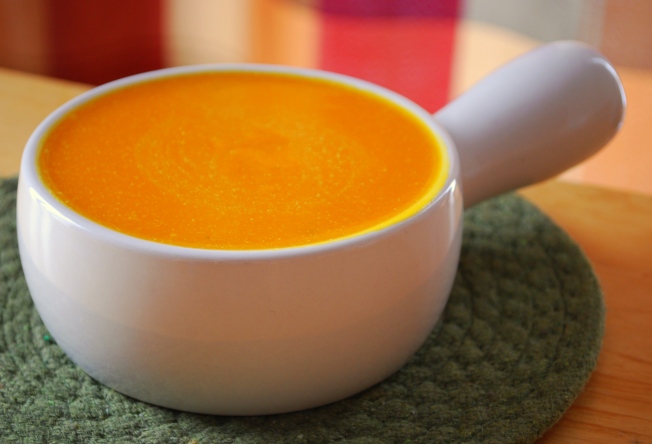
For this soup I used one of my new (to me) discoveries, a favorite ingredient of mine for the cold months. Please meet Miss Kabocha:

Otherwise known as butter cup squash, this lil’ pumpkin is sweet and of beautiful, creamy, spreadable texture. Well, like butter!

And as with many other concoctions I cook, how do I know this is good? Because the husband loved it. That is all you need to know.
Ok fine, I’ll tell you more. Stephen is picky-ass-picky um, particular about his soups. They have to be just the right texture, not too watery and not too thick; they have to have the precise amount of savoring, not too salty, not too bland. The flavors need to be craftily meshed together through the right amount of simmering. You get the picture. Me? Throw shit in a pot and call it a day. There ain’t nothing that can’t be fixed with more water or salt, me says.

So maybe I’m not your most reliable source for tasty soups since my bar is low way down there, but trust the husband. He knows his shizz.

buttercup squash soup


Kabocha (Butter nut) Squash Soup

1 kabocha squash

2 Tbs butter (or vegan spread)

a splash of coconut milk (or your milk of choice)

sea salt to taste

Begin with slicing the squash in half and placing both halves with the cut parts facing down on a baking sheet. Broil in the oven at 350 F for about 40 minutes, until the squash is super tender. Once ready, use a spoon to remove the seeds. Spoon out all the meat and place it in a blender with a little bit of water. Blend well.

Melt the butter in a saucepan and add the liquified squash. Add the splash of milk and salt, and bring to a rolling boil. Once the mixture is boiling lower the temperature to leave it simmer. Adjust your seasoning to taste, and add more milk until you reach your desired consistency.

And this is the part where you can make things interesting. If you wish, go crazy with the toppings. Here are some ideas of things you can sprinkle on top:

-Crumble cheese (like Feta or Panela)

-Roasted pumpkin seeds

-Hemp seeds

-Nutritional yeast

-A dash of chipotle adobo, to make it hot and spicy.

-Crumbled walnuts

Many possibilities for different flavors! Suddenly winter doesn’t seem so looming and dark. Now we just gotta work on designing high heel cute snow boots.

Roasted Veggies And Quinoa Salad

Standard

This is the kind of salad you can tweak around all you want, and the results are equally fantastic. Unless you add, like, Skittles or something weird like that. Please don’t add Skittles.
But really, in the mood for cheese? Sprinkle some feta on top. Wanting a dose of healthy fats? A bit of walnuts, almonds or cashews will do the trick. In the mood for a dash of hotness? Dice a jalapeno and roast it, too. Have the odd leftover veggie starting to look sad in the fridge? Toss it in, almost any vegetable works great here.
You know how roasting vegetables can take a bit of time. What I like to do is roast double the amount and save the leftovers for next day; you can even do more if you don’t mind eating the same food for a few days in a row.


Pair it up with a bed of leafy greens and you’re left with a nutritious powerhouse– an excellent energy source for middle of the day meal, or a protein packed light dinner.


Roasted Veggies and Quinoa Salad

3/4 C of quinoa, cooked

Yellow and red pepper

Zucchini

Red onion

Cherry tomatoes

Mushrooms

Two handfuls of leafy greens (I went with baby spinach)

Coconut oil

Balsamic vinegar, to taste

Salt and pepper, to taste


Preheat oven at 350 F. Prep your veggies by chopping to the shape and size you prefer and drizzling lightly with the melted coconut oil. Place them on a baking sheet and roast in the preheated oven for about 20-25 minutes, keeping an eye on them and moving them around once in between.
Once roasted bring them out and flavor them with the balsamic vinegar, salt and pepper.

Place a bed of leafy greens on your plate, then add the cooked quinoa (and you can drizzle some balsamic vinegar on the quinoa for added flavor). Chuck the veggies on top of it all, and scarf down with joy!


It’s “Steakhouse Good”, The Husband Said: Grilled Marinated Shiitake

Standard

Is it still grilling weather in your region? You can say so if it is. I won’t be jealous nor will I wish torrential rains upon you. Promise.

During this past summer something was decidedly off with my cooking: I managed to ruin entire meals on the grill, on the stove, and in the toaster oven. Husbando was rooting for me to break the record and char something in the microwave already. Har har.

With this dish I finally got it right, though. A grilled shiitake mushroom so juicy and flavorful that, in the hubs’ words “it’s really good. It’s, like, steakhouse good.” Now if only I could get the kid to overcome her aversion of edible fungi.

And why shiitake, you ask? Because they are a fabulous! Regarded as medicinal by the Chinese for thousands of years, these humble looking ‘shrooms pack an amazing amount of iron, B-vitamins, and minerals. They also support cardiovascular health and they help our immune system. Add to this that an estimated 100 compounds in the shiitake mushroom work together as anti-tumors, and we have a winner.

I chose to serve my mushroom accompanied by the veggies I would add to a burger (lettuce, tomato, red onion) but I skipped the buns, and grilled asparagus and fresh baby carrots completed the meal. Shiitakes are fleshy in a very meat-like way, which makes them excellent stand ins for burger patties or steaks.

Grilled Marinated Shiitake

4 Shiitake mushrooms, de-stemmed and clean

Asparagus

Baby carrots

Any veggies you want for accompanying your mushroom: lettuce, tomato, onion, zucchini, peppers, etc.

Soy sauce

Sea salt to taste

For the mushroom marinade:

1/4 C of Extra virgin olive oil

1/4 C of freshly squeezed lemon or lime juice

3 garlic cloves, crushed

1 tsp dry rosemary

salt and pepper to taste

Mix up your marinade and place the clean mushrooms in it. Leave them there for 30 minutes to an hour, making sure you flip the mushrooms once so they soak equally on both sides.

In the meanwhile, prepare your asparagus by cutting off the lower ends and shaving off the tougher stems. Place them in tin foil and drizzle lightly with a bit of soy sauce and sprinkle with sea salt. Wrap up the tin foil.

You may want to put the asparagus on the grill a few minutes before you add the mushrooms, since we want to make sure everything cooks at the same time. The mushrooms will need no wrapping, just place them directly on the grill.  The ‘shrooms will cook very quickly, needing at most maybe 3 minutes on each side; you don’t want to overcook them and thus cancel out the nutrients!

Since it goes so fast, be vigilant. Be very, very vigilant. Unless you want to end up like me, cussing like a sailor because you managed to burn dinner again.

Cranberry Walnut Salad With Sweet Balsamic Vinaigrette

Standard

You may have noticed a lack of posts lately and all I can do is blame the summer. It’s busy and hot and I’m pregnant and hot which means I don’t want to even look at the stove, let alone have to cook on it.

There has been a lot of grilling going on but I suck at grilling and end up burning half the shit, so no blog-worthy pictures there.

BUT today it hit me that I haven’t shared with you the salad that has been my main mid-day sustenance for the past few weeks. It’s fresh, flavorful, filling… and fucking fantastic (so many ‘f’s. I just had to.)

I was introduced to this salad a couple of months ago at a breastfeeding course with fellow doula friends. It was a potluck get together with lots of good stuff to eat, and we all at some point swarmed this salad until it was gone. I even tried pulling my I’m pregnant so you should totally leave that for me card with no success: The salad was gone before I could go back for (ahem) fourths. Bitches.

So of course I had to email my friend and ask her what this yummy greenness was all about. Today I ate an entire head of romaine lettuce by myself in this salad. I’m waiting to start growing roots on my feet any moment now.

I must apologize for the lack of photo editing. My laptop got sent back for fixing and I’m barred from installing any software into my husband’s computer. Like, infect the man’s laptop with a virus ONCE and suddenly your downloading privileges are nonexistent. Sheesh.

Cranberry Walnut Salad With Sweet Balsamic Vinaigrette

Salad greens (spring mix or all lettuce. I used romaine.)

Feta cheese

Apple chunks (optional. I didn’t have any, but I highly recommend you add some)

Dried cranberries

Walnuts (toasted or raw)

Dressing
1/4 cup balsamic vinegar
2 teaspoons dark brown sugar
1 tablespoon chopped garlic
1/2 teaspoon salt
1/2 teaspoon fresh ground black pepper
3/4 cup olive oil
Shake together in small mason jar.
Do I really need to tell you how to assemble this? I figured. Just toss it all together and enjoy the goodness.

Almond Couscous And Persian Salad

Standard

I hadn’t tried couscous until I moved to Canada and I like it because it’s a wonderful stand in for staple grains such as rice. Not in vain has it remained key to the diet of Morocco’s people, as well as in other North African countries. Make sure you get whole wheat couscous though, because like with any other grain the white version is far too refined to be recommendable. The addition of protein in the form of almonds and in combination with the Persian and green salads makes of this a full dirt cheap! meal. Alternatively, instead of almonds you can use chickpeas, cashews or black-eyes beans.

As for the Persian salad, this is one I had for the first time a year ago when an Iranian client took us to a restaurant specialized in traditional foods from his country, in Toronto. In that same place I fell in love with Basmatti rice so you can imagine it was an evening of flavorful discoveries for me. Cool and refreshing, this salad makes a perfect side dish in the hot summer months.

One thing I keep noticing over and over in my desire to eat well is that it is extremely helpful to venture out of our customs, traditions and meal preparing habits. Ethnic food offers a wide array of delicious options that have worked wonders for centuries for other civilizations, and very often they are quite easy and cheap to prepare (and if you ask me, easy, cheap and healthy are the trifecta that describes an excellent meal.)

Also –and this has to be said– when we see the global trends to discover that North America stands among the unhealthiest, largest, most inactive populations… that’s got to make things click. Something is obviously very, very wrong. Apparently today 50% of the people in the U.S. are at real risk of suffering a disease linked directly to their eating habits. That’s half the population of the entire country getting sick and/or dying just because of what they choose to put in their mouths. It’s ridiculous! I’ll pass on that thankyouverymuch, and I’ll stick to eating what people in healthier countries eat.

Almond Couscous and Persian Salad

1 C whole wheat couscous

3/4 C almonds

chopped veggies, as many as you like. I used:

Green bell pepper

Orange bell pepper

Red onion

Minced ginger root

1 Tbs extra virgin olive oil

Turmeric, cumin, salt, cinnamon, to taste

boiling water

Green onion or cilantro, for garnish

Place the dry couscous in a glass bowl and mix in all the spices and chopped vegetables. Drizzle with the olive oil. Now add enough boiling water to cover 1 cm. over the couscous, stir a couple of times gently, cover and let it sit for about 10 minutes. Garnish with green onion or cilantro.

For the Persian salad you’ll need:

1 English cucumber

1 tomato

1/4 red onion

juice of 1 lime

salt to taste

Make sure the cucumber, tomato and red onion are diced very finely. Bathe in lime juice and salt to taste. It’s better if made at least 1 hour beforehand and left to chill in the fridge.


Thai, Japanese, Indian, Moroccan, Ethiopian food… we sure have a world of flavors to discover! I’M ON IT.


The Perfect Hangover Breakfast. I Mean… Mexican Brunch. Yeah.

Standard

It’s been a week of running around, fixing up the house, hosting parties, celebrating birthdays, cleaning up… and we’re not finished yet. I’m tired.

Also, I’m now officially thirty years old, which I’m sure grants me additional bitching advantages.

Even though I can’t drink, what with the baby producin’ going on in here, you can’t blame me for not thinking of those of you who can and do (you bastards), so I bring you the perfect solution for your hangover mornings. Though this is a health and fitness blog, so what I really mean to say is did you know alcohol can be a major contributing factor in trumping weight loss goals? Now you do. Hey, if I can’t enjoy a drink no one should.

Back to cooking.

Tomatoes, onion and peppers are the three staples to accompany almost any dish in Mexican cooking. This brunch isn’t the exception.


Use an iron skillet for additional iron in your food. That’s right, cooking in iron pots and pans increases the iron content of your yums, as explained in this article published in the Journal of Food Science. Plus iron skillets give that old time ranch, wild west, pioneer feel to your kitchen. I’m sure that enhances the flavor.

With a side of black beans an avocado this brunch is a sure powerhouse of awesomeness. Heart-protecting, fiber-giving, anti-inflammatory, cancer-fighting awesomeness.


Mexican Brunch

2 farm eggs

1 jalapeno pepper

1 tomato

1 small onion

1/2 avocado

1 slice whole wheat bread

refried black beans

salsa

chipotle powder (optional)

salt and pepper to taste

1 Tbs oil (I used coconut)

Heat the oil and saute the sliced onion and jalapeno in the skillet. After about 8 minutes, add the tomato slices. Once the veggies are cooked, crack the eggs on top of them and flavor with salt and pepper to taste. Cover the skillet if you like your yolks to cook instead of staying runny.

Toast your whole wheat bread and slice the avocado on it. Heat the beans and sprinkle with chipotle powder, if using. Take the veggies with the cooked eggs on top and pass them to your plate; cover in salsa.


Ideally I would have used two corn tortillas instead of the bread, but I didn’t have any at hand this time. Using corn tortillas in lieu of would also turn this into a gluten-free meal, if that’s something you need to watch.

Eat while promising yourself never to drink like that again.